background

Spice Mag

  • home
  • Money
    • Business
    • Employment
    • Investing
    • Personal
  • Technology
    • Blogging
    • Consulting
    • Outsourcing
    • Technology
  • Travel
    • Luzon
    • Visayas
    • Mindanao
    • International
  • Contact me
    • Contact us

Featured Post

Pinoy Travel Bloggers - The Journey is the Destination

How To Get There? This is the most common question asked by some travelers who wanted to visit certain tourist destination in the Philippin...

Labels

  • Adventure Race (1)
  • Avatar (1)
  • Biking (9)
  • Cagayan Valley. River (1)
  • Employment (1)
  • Falls (1)
  • Food (1)
  • General Santos City (13)
  • Golf Club (1)
  • Hills (1)
  • Itinerary (1)
  • Luzon (1)
  • Mindanao (9)
  • Money (1)
  • Recreation (12)
  • Review (4)
  • Running (1)
  • South Cotabato (8)
  • Sponsored (5)
  • Swimming (1)
  • Travel (11)
  • Visayas (1)

Total Pageviews

Showing posts with label Recreation. Show all posts

We were once busy with my partner at SMFI implementing the Dealer Information System, when all of a sudden our team leader visited us, to check for some concerns and do system audit.  The next day he invited us into their hometown at Aparri, the last frontier of the Philippine archipelago. We then visited the famous Aparri Delta, which was an impressive expanse of land, where one can see the longest and widest river in the country meet with the China sea except for the group if islets of Babuyan islands and Batian islands.   I had my own story also of the power and beauty of the place, we take a swim at the shorelines, with the force of the current if you stay there for more than 30 minutes, it might crumple your bones to death.


We even take a peek of the Aparri water district and climb at the top of the steel case ladder.  If you're lucky enough, you could view Vietnam far from a distance.  There is also a light house, where you can climb with.  You can also do some fishing along with the villagers.  You can take a seat at the concrete path road and witness the power of the waves.  Just be careful as some portions are already crack down or have loosen.

As a mountain biker it is very important that you know the basic parts of your mountain bike so that you know what you want when purchasing/ repairing/upgrading your ride when the parts wear out or maybe when you want a lighter weight that will help you increase your speed.  Knowing you're mountain bike parts, will remove the dummy feeling about the components that make your ride a worth experience travel. 

When I purchased/assembled my mountain bike, I really don't have that much idea on what brands and types of bike parts are essential to have a solid state mountain bike, that will look awesome and at the same time with greater performance compared to those ordinary mountain bike which could be purchased on non-specialty shops like hardware.  

First thing to be considered when purchasing your mountain bike is to identify what type of riding you are planning to do. Is it free ride, hard tail, downhill or full suspension mountain bike? 

Here are some of the basic parts of the mountain bike, if you plan to assemble / canvass. 
Frame - the mountain bike frame is the foundation/skeleton/core of the bike.  This is responsible in holding all the other mountain bike parts, whether they are the basic parts or bike accessories.  It is very important that you decide the right frame size that matches your height and inseam to reward yourself a comfortable ride.   The mountain bike frames comes also in different materials according to their price and lightness - steel, alloy, aluminum, carbon fibre and the best of all is titanium material. 

Fork and Shock Absorber - mountain bike suspension systems minimize the shocks or jolt every time you put your bike into its limit such as riding in rough terrain or trails.  The two general classification of suspension systems are front suspension and dual suspension.  Front suspensions have a set of shock absorbers attached to the front wheel.   While dual suspension have rear and front sections which is very ideal for technical terrains. 

Handlebar -mountain bike handlebar is located at the front of the bike, this is what you used to steer or maneuver your bike.  It also comes in different styles and shapes to meet the specific needs of any rider.  This also holds the derailleur shifters, brake levers, headlight and cyclocomputer attachment.  As a general rule to provide additional comfort, the handlebar should be wider than the rider's shoulders.  The wider the handlebar, the more control and leverage but the response time in making turns would be slower and difficult.  
Stem - mountain bike stems connects the steering tube of the fork and handlebars.  This will help determine the distance of your reach to your handlebars and your position.  The longer the stem, the more stretched out you are.  Stems are measured in terms of millimeters. 

Headset - mountain bike headsets is responsible for the rotatable interface between the fork and the frame.   Most of the headset consists of two cups that are pressed into the top and bottom of the head tube.

Saddle - mountain bike saddles help improve the comfort of your ride.  Without a standard measure saddle that will catch your entire butt, then surely a pain on the road will be encountered.  Take not also that more padding does not mean more comfort; it still depends on how you adjust your seat properly. 

Seat Post - mountain bike seat post are designed to take all the abuse that the trail can throw to the rider.  There is also a suspension post which is a great way of minimizing the bumps out of your ride without too much hassle and expense but with the comfort of full suspension model. 

Cranks - mountain bike cranks holds the chain rings and chains which make the mountain bike move 

Rod - mountain bike rod holds the cranks and the pedals. 

Pedals - mountain bike pedals is where you step your two foot to create a cycled motion that will make the bike move.  Choosing the right pedals will make you a better rider, make your ride safer, gives you more control with your bike and provides more pedaling efficiency.  The four basic type of pedals are basic platform, advanced platform, toe clips or cage style and clip less.  There is also newer type of pedals, which features a dual platform such as basic platform on one side and on the other side is cage style. 

Hub - mountain bike hub is located at the center portion of the wheels which holds the spokes attached to the rim and 2 machined metal flanges.  

Spokes - mountain bike spokes are wires joining the hub to the rim, which adds extra strength to support your weight on the wheel.  It also transfers the power of your pedaling from the hub to the wheel. 

Rim - the mountain bike rims holds spokes in the inside and the tire on the outside.  The rim is commonly a metal extrusion that is butted into it to form a hoop.  The rims usually measure between 26 - 29 inches in diameter.  This also improves the ride to be smoother and safer especially in withholding bumps, jumps and obstacles. 

Tires - mountain bike tire is the only bike part which has direct contact to the ground.  The tires are usually wider and knobbier, which provides better traction and stability.  Most tires have inflated tubes/interior inside but there are newer variations also which features a tubeless tire system.  The important things to be considered when selecting your tires are weight, traction and durability. 

Cassette - mountain bike cassette/cogset is located on your rear wheel.  Usually a mountain bike has 5-9 stacks of sprocket, which is used by a rider to shift; to make the riding/pedaling easier especially on hills and to go faster on flat surface. 

Chain - mountain bike chain are circular set of links used to transfer the power from chain ring to cassette.

Front Derailleur - mountain bike front derailleur is used to shift the chain rings from one to the other.  In short derailleur is used to change the speed of pedaling when biking. 

Rear Derailleur - mountain bike rear derailleur is used to shift the cassette from one to the other. 

Derailleur Shifters - mountain bike shifters control the front and rear derailleur, allowing the shifting of the gear from low to high speed and vice versa especially when crossing different terrains.  The shifters almost have a similar look with the brake levers and are located next to the handle grips. 

Brakes - mountain bike brakes is very important part of the bike because of its primary purpose to stop the bike.  Aside from that, they also help regulate the speed, control your bike and make it possible to perform advanced techniques.  The two basic types of brakes are the disc brakes and the rim brakes.  Disc brakes perform best even on muddy situations, but they are usually heavier than rim brakes. 

Brake Levers - mountain bike brake levers is the mechanical or hydraulic mechanism used by rider to transmit the force applied by the rider to the brakes.  The brake levers are mounted on the handlebars within easy reach of the rider's hand.
General Santos City is now an emerging Adventure Race here in the Philippines because of the recent awards it had received last year (2010) for the "Best Tourism Event of the Philippines Adventure and Sports Category, City Level by the Association of the Tourism Officers of the Philippines (ATOP).  This event was organized by the City Government of General Santos City through Tourism, Cultural Promotion and Development Division of the City Economic Management and Cooperative Development Office in partnership with the Department of Tourism.  This event is an annual activity spearheaded by Hon. Virgie T. Llido- the Sangguniang Panglungsod - Committee Chair on Tourism and Race Director Mr.Jing Velos, a well known and experienced mountaineer, caver, biker, photographer and one of the pillars of the Sarangani Bay Area Outdoor Club.  


This event will surely promote the historical and adventure destinations in General Santos City.  With my first time personal chat to Mr.Jing Velos last March, he had greatly informed us that this year, they had prepared more demanding challenges, which will be on May 5-7, 2011.  On the first day will be the pre-race activities, then on the 2nd and 3rd day will be the actual adventure race and awarding ceremony.  This event aims to bring together the different outdoor/backpacker lovers, photographers, artist, hobbyists, academe partners, investors, bloggers, outdoor clubs, shop operators, tour and guide operators.

This year still the same count of groups (15 teams) will be qualified to participate in the race and they will be screen by the race director himself. Each group will have four (4) members of which three (3) members will do the actual race (2 Male and 1 Female) and the other member (male/female) will act as the group logistics and for no other reasons could participate in the race.  Each group should submit a duly accomplished form, waivers and submit a medical certification attesting that the participants are fit for such activities.


The event will be divided into several control points and transitions.  For each transition the players must follow strictly the race instructions, which will start from a pit stop, then traverse several points and perform or more tasks, then depart to another control point.  For every pit stops a mandatory rest time may be impose, special tasks and trivia questions may be given.
 
This event is not only about race but also their will be a tree planting, Barangay Cultural Immersion and XRM motor show. 

Good luck to all the participants of the race, especially to my friend Rainier Paul Formoso and Engr. Emerald Rangis.  I hope to play or compete with you next year side by side. 

Race Disciplines
-   Trail Running
-   Mountain Biking
-   Open-water swimming
-   Scooter Riding
-   Zip Lining
The following are the Prizes for the 4th Gensan Eco Karera
-   Champion                     Php 35,000.00 + Medals
-   1st Runner Up              Php 25,000.00 + Medals
-   2nd Runner Up             Php 15,000.00 + Medals
-   3rd Runner Up             Php 10,000.00 + Medals
-   5th-15th Place              Php  4,000.00 + Medals
Note: Only Finishers will be able to receive the consolation prize.
Mandatory Gear (per team)
-   Mountain Bike (3)
-   Helmets (3)
-   Life Vest (2)
-   Running Shoes (3)
-   Water Bottles/Hydration Pack (3)
-   Headlight/Flashlight (3)
-   Tablespoon (3)
-   Multi-tool knife (1)
-   Air Pump (1)
-   First Aid Kit
-   Cellphone (1)
-   Food Storage
Pocket Money
1 unit of Motorcycle or Vehicle for the logistics personnel.
For Details Please Contact:
4th Gensan Eco Karera Organizing Committee
Office of the City Economic Management and Cooperative Development
3rd Floor Dadiangas East Hall, Quirino Avenue corner Laurel Avenue, General Santos City
Website:http://www.facebook.com/gensanecokarera
              http://www.gnsanecokarera.multiply.com/
              http://www.facebook.com/magandanggensan
              http://www.gensantos.gov.ph
Email: gensan_ecokarera@yahoo.com
Phone: (083) 553-8338
       0916 3419546 - Jing
       0918 5062266 - Weng
       0917 5588677 - Darlbs
Highest Mountain of the Philippines Mt. Apo Via  Kapatagan - Kidapawan Trail
Preparing for the Bike Camping at Nopol Hills, General Santos City.
General Arze could be associated to the avatar, which I usually brought with me when traveling.  I first used the concept of avatar last 2008, when I joined the 3rd Annual Penek Busay of the Digos Active Mountaineer.  This was also the first time; I did backpacking here in Mindanao, since I came back from a 2 year worked from Metro Manila.  The avatar helped me with my struggles in the wilderness especially in moments of lost on the trail or for those times I wanted to be alone while reflecting on the things that happened through my life.  General Arze had been with me in many of my journeys, whether in food tripping, mountain climbing, mountain biking, caving, falls hopping, zip lining and many more. 

Please feel free to browse some of the adventures of General ArzeAvatar.  More backpacking adventures for 2012, I am already planning my calendar of events.

Mt. Dulang-Dulang to Mt.Kitanglad - Bukidnon
Mt. Matutum via Glandang Trail - Tupi, South Cotabato
Mt. Matutum via Keumang Trail - Polomolok, South Cotabato
Yellow Gate Adventure Resort - Marilog, Davao
Calda Pizza - General Santos City


AMSIKONG FALLS
General Santos City, South Cotabato  

This itinerary was based on the event on which General Arze had participated with.  This itinerary may not be the best suitable for you or for your group as backpacking depends on the speed and endurance of each climber.

Amsikong Falls is located between the territorial boundaries of General Santos City and Polomolok town in South Cotabato.  This falls flows from the mountaintop river in Camp Flores in Polomolok down to the granite boulders and limestone cliffs of Barangay Conel, creating small pools.  


Itinerary 
06:00am ETA Assembly – Lagao Public Market
06:30am ETD Take Service / Tricyle to Barangay Hall of Barngay Conel
 07:00am ETA Barangay Hall (Orientation ang Registration)
08:00am Start Trek going to Water Source
08:45am ETA Water Source
09:00am Resume Trek to Basketball Court – Ranch
09:45am ETA at Ranch – Break
10:00am ETD to Jump-off
11:00am Lunch Break
11:30am Resume Trek towards the Falls
12:30pm Basin (Option for Swimming – Water is Deep)
02:00pm Start Trek to Jump-off
03:00pm ETA Jump-off – Break
03:30pm ETD to Ranch
04:15pm ETA Ranch – Break
04:30pm ETD to Water Source
05:15pm ETA to Barangay Hall
05:30pm ETD Barangay

Notes & Reminders:
1. Don’t be late
2. Approximate trekking time: 3-4 hrs
3. Expect to rain during duration of the trek. Prepare for wet and cold trekking.  Secure all your clothes and electronics in plastic bags.  Bring a raincoat or poncho.
4. Suggested trekking attire: long-sleeve shirt, jogging pants or leggings.  Also bring your trekking gloves (if you have pair)
5. Bring flash light or head lamp and extra batteries (in case of emergency)
6. Bring sufficient trail food and meals for the duration of the climb
7. Bring tissue or baby wipes and extra plastic or garbage bags
8. Keep your personal trash


FEE: 100
- Transportation Lagao public market to barangay hall of Conel (vice versa) .  We discouraged bringing your own vehicles because you would be already tired after the trek.  But if you insist, you may.
- Registration fee on barangay (if required)
- Gasoline share for barangay, if service can be provided from barangay hall to jump-off
- Guide fee, for strict compliance with the barangay regulations and for protection purpose.

Purok Balakayo, Barangay Olympog of General Santos City, South Cotabato is one of the heavens paradise of the Tuna Capital of the Philippines.  It is where the first and only zipline and cablecar in Gensan is located.   The hills is also an ideal place for trekking, camping, photo ops, trail running, motor trailing, mountain biking and many others.

Balakayo Hills, was also one of the pitstop  Gensan Eco Karera an adventure race hosted by the City Government of General Santos City sperheaded by sir Jing Velos.


Mountain Biking was one of my favorite past time because you get to see many different places even in your own locality.  Not only that, it is a good exercise to trim down all those carbohydrates and fats intake to keep a healthy and active lifestyle. Unfortunately this mountain bike, does not belong to me anymore.  I miss you General Arze Mountain Bike, sooner or later I am hoping that I could buy a brand new mountain bike.  But most importantly donors are very much welcome. hehehehe Enjoy life, enjoy serenity.  Go get your mountain bike and start reducing the carbon footprints.


When General Arze was still a child until his highs cool days, he used to have a BMX and mountain bike.  He usually ride his bikes during playtime hours and weekends, and cases on which his parents ask him to purchase something on the store or on the market. During college days, his desire for biking had stopped as he was very busy with academic and extra-curricular activities in school.   

But then last October 22, 2010, he officially purchase a brand new mountain bike with the help of Sir Dodong in identifying what brands or parts to be purchased and at the same time considering my budget and likes.  On that day, he pedaled his MTBike from the shop up to Malesido Phase 3.  The ride was just simple yet fulfilling because after how many years of not biking, he was able to make it to their house without any scratches and glitches.   

Before leaving the shop, Sir Danny drops by at the shop to meet me and hibalag. He had invited us also to drop by at Jollibee National Highway - 6:00am on Sunday, so that we could join them during their weekly fun ride, which was scheduled on the hills of Alabel, Sarangani Province.  Without any hesitation, I said yes and confirmed that we are joining them.

The moment of truth had finally come; the 1st leg of the ride was plain and simple as we pedaled on the highway only.  Then after an hour of pedaling, we had reached the pave road and the entry level of the 2nd leg was a steep pedaled, and that was the first time I had practice changing my gears that suits my need during the ascent.   Then next to it was a very long down hill then a minor uphill.  Although it was minor, I had a very difficulty on pedaling through it because I lack cardio exercise.   Due to this experience I had told to myself that I had to improve my biking and thus it was the reason why I started to go on solo ride, so that the group will not kept on waiting for me on when I could reach the finish line/rest area.  See you soon MTBikers, I just need to improve my cardio, speed and endurance.

For those who wanted to go solo ride, please consider some of the safety tips, advantages and disadvantages.  Mostly of which are base on my observations, experiences and readings. Safety Tips:
-   Always wear a helmet, to prevent head injuries for minor troubles that may arise
-   Bring a map and at the same time inform someone on where you are going and how long is your estimated time to be back home, so that in cases you had reached the maximum time and still your not home, then they now were to start looking for you
-   Bring hydration pack and energy booster like hydrite tables / gatorade to help you regain the lost energy faster.
-   Bring identification cards with contact numbers in case of emergency and police/brgy. outpost checkups.
-   Bring enough cash for food and emergency ride and bring also fully charged cellphone and make sure your sim card has a load enough to make emergency calls.  Make sure also that electronic devices and cash are placed on a ziplock.
-   Bring first aid kits and learn how to use them
-   Bring MTBike tools and of course learn how to use them.  Such tools to be considered are allen keys / wrench, chain cutter and air pump
-   Bring spare interior [make sure it has no damage].  Bring also patch kit in case that your spare interior will be flat
-   Greet your fellow MTBikers, whether they belong to a group or they go solo also.  Greet also the locals for those areas on which you are going to take your nap/rest.
-   For night ride, wear light-colored jersey and cycling/trek shorts.  Bring also rear blinkers/tail lights, headlamps and headlights
-   Don't ride too much technical downhill and uphill trails, because if you'll happen to get into accident, then no one will be able to help you.
-   In case you forgot to bring your tools, never hesitate to ask help from the locals / fellow bikers, you will be astonish that Filipinos are really helpful
-   Bring a whistle to be used in calling out for attention/help.  The international mountaineering distress signal is six (6) blasts to a minute.  To signal aid is on the way, give (3) blasts to a minute.
-   Obey traffic rules
-   Lastly create checklist a night before the long ride
Advantages:
-   You don't need to wait for fellow riders who might be late or not show up anymore.  Thus the group ride could not be compromise with the speed of each rider.  In this way you could go as far as you want thinking only of your own schedule.

Disadvantages:
-   If you ride alone, make sure to choose the best routes and trails on which you think your safety would not be compromised.
-   Solo riders are mere subjects to bully especially if they saw you that you pedaled slow or push you bike on steep ascents/descents
-   No one will be able to help you directly in case you get into trouble even though you have to shout loud, especially on those rural areas.
    This was the first time that I was able to purchase a Deuter product.  The product I'm trying to tell you was the Deuter Race Bike Cycling 10Liters Backpack.  The design of the backpack was very well groomed, neatly tailored and looks more athletic.  Its clean design was made of technical hexlite 210 / microchip-nylon, which made the product perfectly lightweight, weighing only about 520grams.  This backpack was the smallest of the Deuter race series and was designed with an optimal ventilation system making the product more comfortable to use.


    With its air stripes back ventilation and teardrop shape. This lightweight race pack will follow the curve of your back, providing much comfort even if it fully loaded.  It has also a highly breathable mesh shoulder strap with anti-chafe pads that will keep our shoulder from being hurt so much.

    Some of the other features of the race pack are as follow:
    -   Adjustable chest strap and hip belt with mesh wings that will provide a lesser movement of backpack when excessively used like during uphill and downhill of biking, spelunking and trail running on mountains.
    -   Small zipped pocket at the top, where you could place your most need item, for easier access when you are going to need it already
    -   Front pocket and valuables pocket inside
    -   3M reflectors at the front, sides and back that will help during night time especially if you forget to bring a tail light when biking.
    -    Mesh side pockets that could fit a 1 liter Nalgene on both sides.
    -    Integrated detachable rain cover with a Deuter logo 3M reflective
    -    Includes also a maximum of 2 liter streamer reservoir.

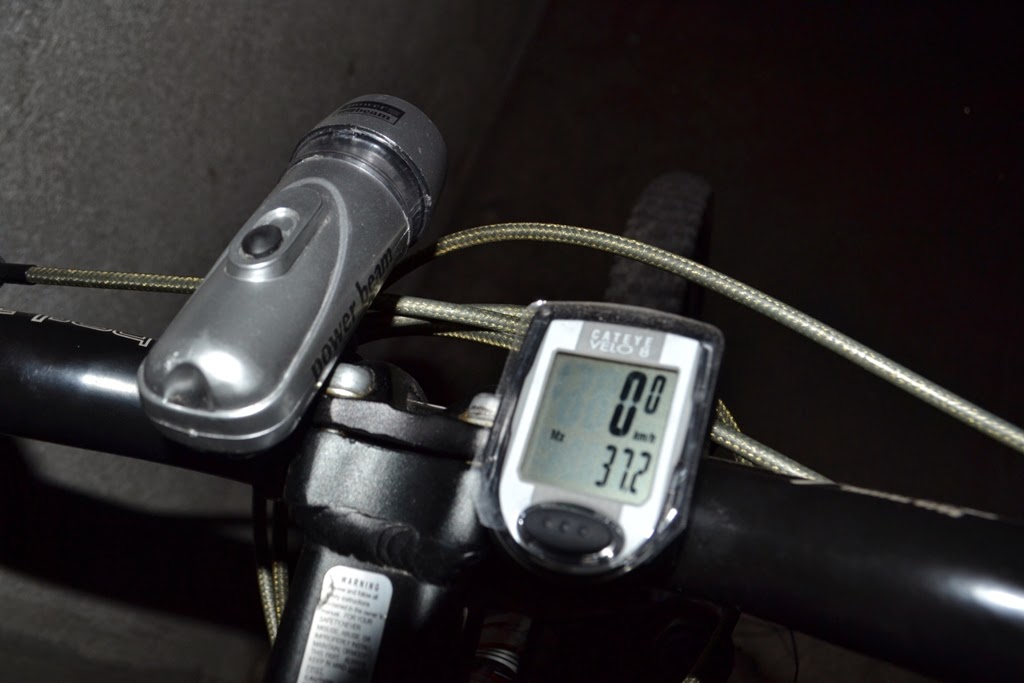
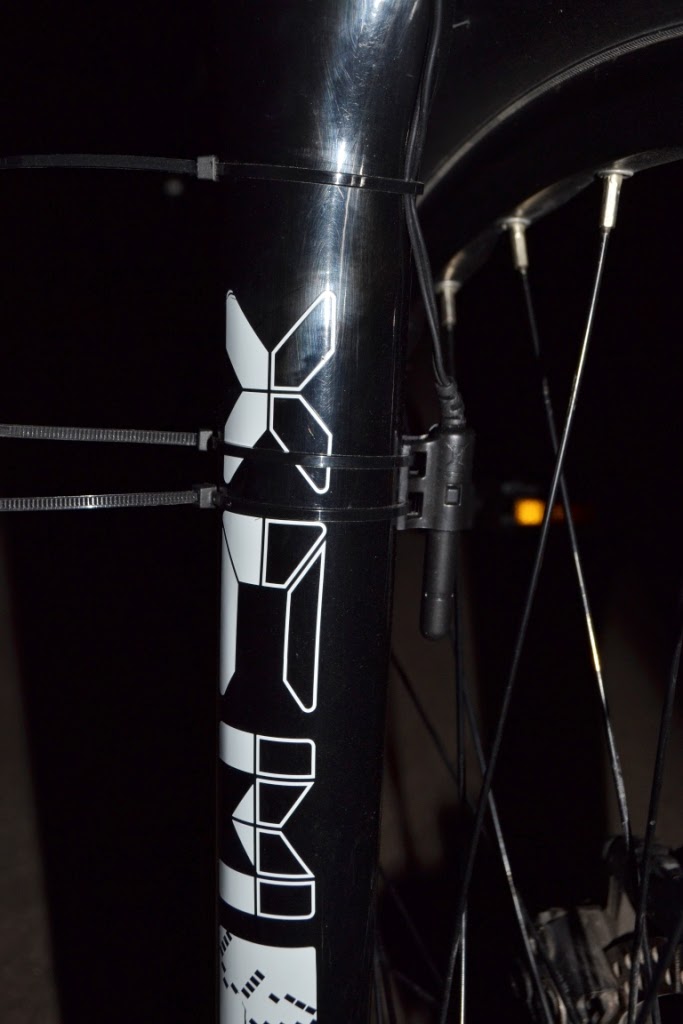
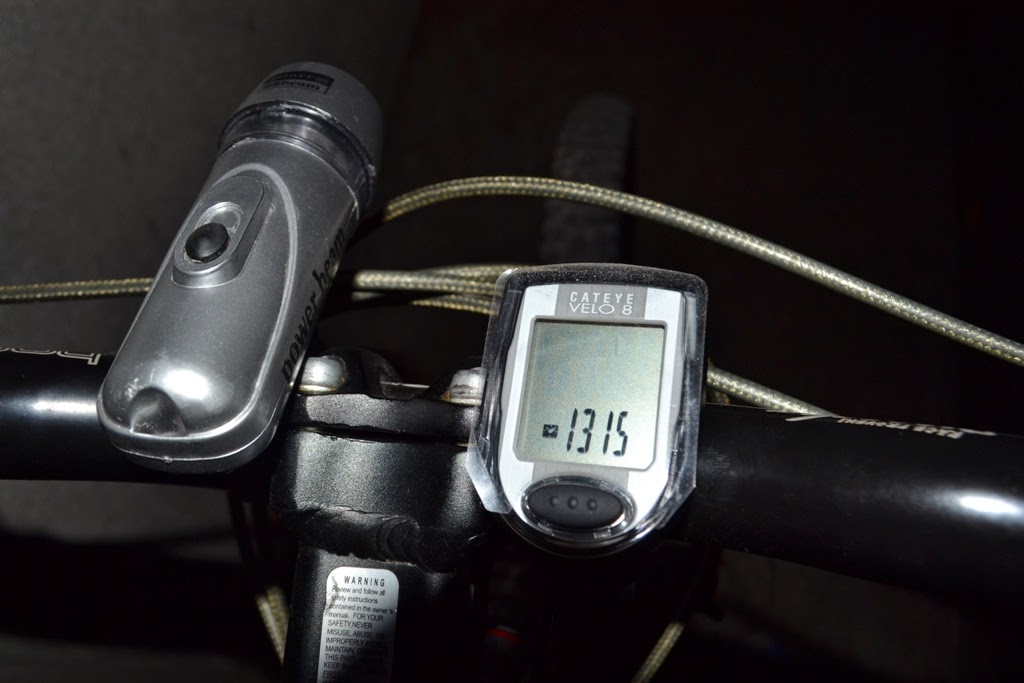
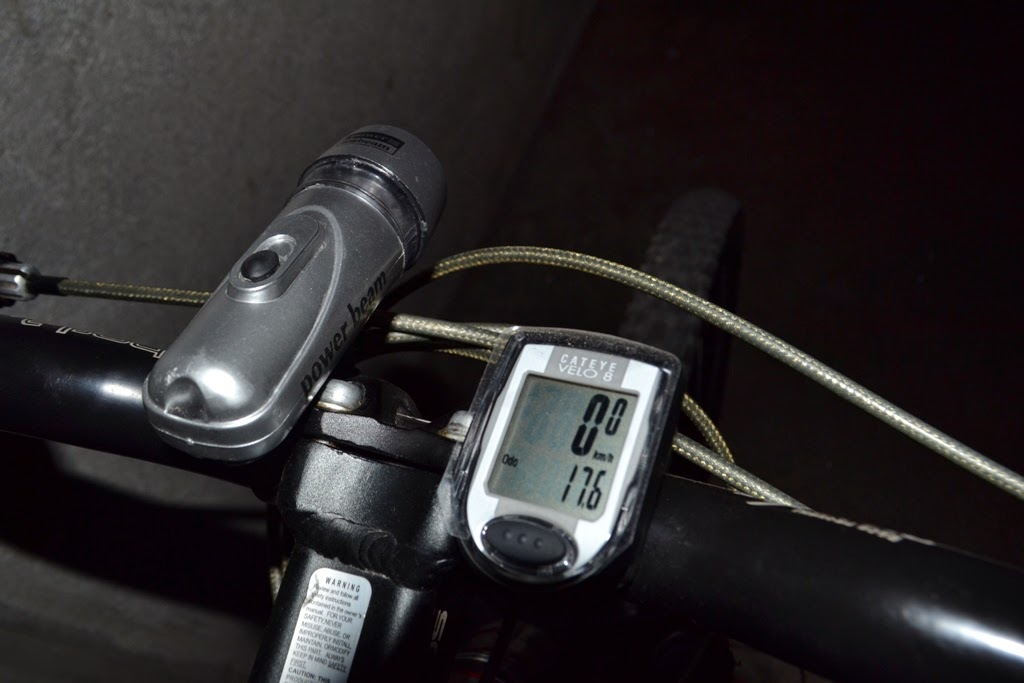
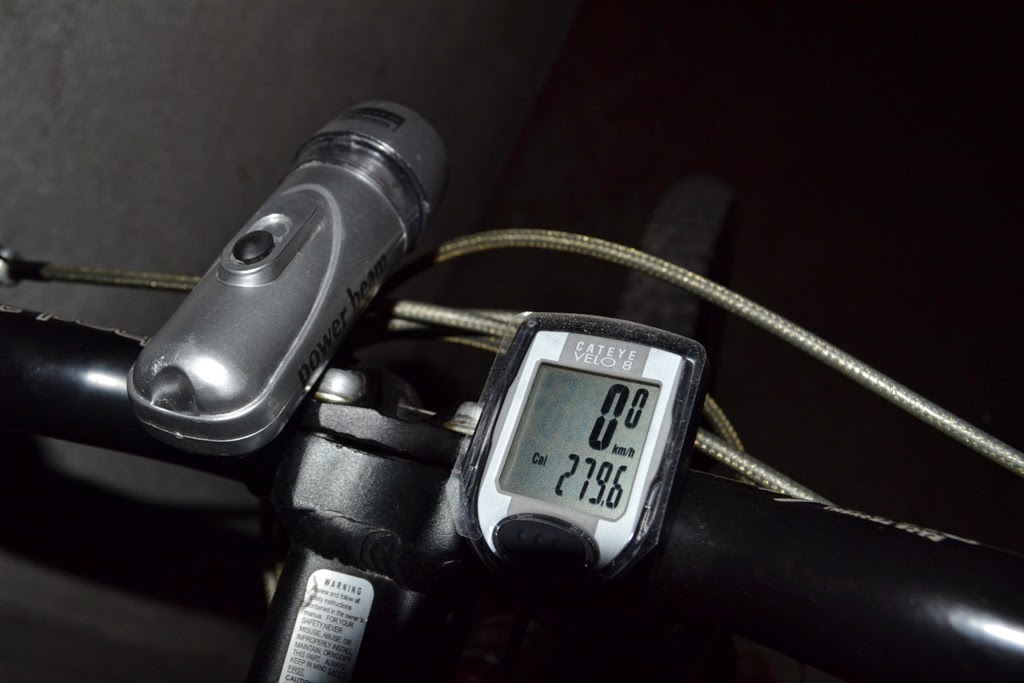
    Biking nowadays had gone to the next level due to the introduction of the cyclocomputer.  With this advancement of technology I decided to purchase an entry level 8 functions cyclocomputer named as CatEye Velo 8.  This bike device is very simple to use and it requires no tools to install / setup.  If I'm not mistaken I think, I had finished installing it around 3 minutes or lesser only.


    Comparing to other Velo products, this one has larger button for changing the cyclocomputer display function and larger screen for a more precise recording and viewing.  This device can measure a rider's current speed, maximum speed, average speed, trip distance, odometer, clock, elapsed time and calorie consumption.  It has also an auto start/stop functionality, which means that the device start measuring automatically when the rider starts pedaling and stops when the bike is in a full stop.  The device has also an auto power-saving mode that will activate after 10 minutes if the main unit does not receive any signal.  Depending also on the rider's choice it could be set into inches or centimeters.  Although it is also impossible for a biker to reach a maximum speed of three digits, still the display could accommodate up to 300 kph/185 mph.  It's pace arrow only measures the speed unlike other products that measure the heart rate and cadence.  If the current speed is faster then an upward arrow will be displayed on the screen and if slower on the average speed then a downward arrow will be displayed.


    Product Package Contents
    -  Bracket
    -  Wire - 27" or 70cm
    -  Sensor
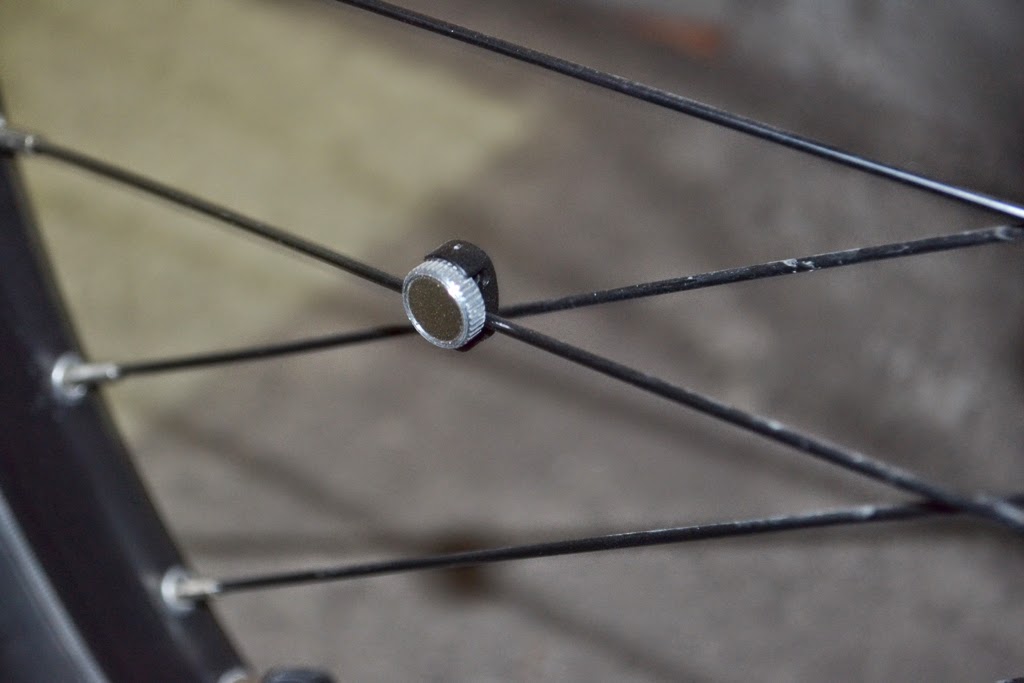
    -  Magnet
    -  Nylon Ties (x7 )
    Things to be consider during / before / after bike ride:
    -   Do not concentrate on the computers display screen while riding.  Eyes should always stay focused on the road and surroundings.  Ride safety must always be upheld.
    -   Be sure that the bracket, sensor and magnet are not loosened and is working.
    -   Do not leave the main unit exposed to direct sunlight when not in used.
    Proper installation of the sensor and magnet:
    -  The magnet center must be aligned with the sensor's marking line.
    -  The distance between the sensor and the magnet be less than 5mm, else it will not work as expected
    After more than a week of enjoying my new passion, my co officemate introduce me some cycling accesories such as the prominent ToPeak brand.   From their I had gain the idea of what accessories I should put on my bike. 
    Let me introduce to you the ToPeak - Wedge Pack Medium, my first mountain biking accessories.   Sometimes this pack is also called as saddle bags as this are place under the mountain bike saddle.
    Here's the wedge pack features, which will help you decide on why to purchase one:

    It has a capacity of 1.07L if not expanded and 1.31L if expanded.   Enough to fit my cellphone, camera, charger, extra t-shirt, wallet, coin purse and other small personal things. It's exterior fabric is made of 1000 Denier Nylon with Dupont Teflon Coating.  This only means that the product is durable and the fabric is not prone to ripping or fraying even if used extensively.  All the zippers are also genuine brand ensuring tough years of service.   Overall the product only weighs 165 grams.
    It has also a white coloring 3M reflective strip for maximum nighttime brightness and visibility especially if mostly of your bike parts are colored black.  The wedge pack has a quick release mounting system that allows fast and easy tool-free mounting and removal of bags.   It has also a seat post strap, which makes the wedge to be attached more stable.

    The product is also compatible with red lite LED.  And lastly it has a weatherproofing as it is provided with a rain cover for additional protection.

    The MOB Helmet upper and lower outer shells are 100% bonded to MOB proprietary EPU Expanded Polyurethane) In-Mold2, a shock-absorbing foam which greatly enhances the quality and safety of a helmet.  Not only that, this product it provides complete supreme durability for the rider because each EPU cell is individually closed together, so that it holds air well to resist impact. The helmet has also a LocWell dial, one of the most advanced head-circumference retention systems on the market.  MOB's unique 'S'-shape belt design alleviates excessive tightness, while the extra coverage hugs your head more securely.  The large dial wheel on the back helps to get the ultimate comfort dialled in perfectly and gets the rider the right position automatically.  This LocWell dial is only available on selected models and I'm lucky enough that what I had purchased has this kind of feature. Today's road test of my new and affordable helmet was worth riding.
    Lastly the helmet is certified to CE EN 1078 helmet standards.

    How to properly fit your helmet.
    1. Place the helmet level from front to back on your head.
    2. To insure the correc fit, push the helmet front to back and from side to side.
    3. Adjust the strap divider and fasten the buckles as mere necessary.
    4. Check the strap length again to make certain the strap is adjusted properly. The strap should be secure but comfortable, under the chin and the hselmet should be level and secure on the head.
    5. Test the overall fit of the helmet with the strap secured.

    Other Available Colors:


    During the past, when I heard of the word arch, I was usually thinking of  brick architecture during the time of the Ancient Romans, as seen on some movies that depicts the history and culture of one's civilization.  In simple words arch can be define as a man-made/natural-made freestanding structure, commonly shaped like an inverted U.  In the Philippines, we could compare the look of the arch like the one used in the Santacruzan festival or Flores de Mayo, welcome signage when you entered or leaved a barangay, city or municipality.  Arch are also used on some sports like running and biking, and they generally served as the start and finish area of the race. Here's one amazing photo of an arch, which was made of dozen of bicycles.  This one is located in Toronto, Canada.


    Photo Credits: http://urbiker.com/

    Popular Posts

    • Sanchez Peak General Santos City
    • Japanese Bunker General Santos City
    • Amsikong Falls General Santos City
    • Poor Clare Monastery Polomolok South Cotabato
    • Dole Kalsangi Polomolok South Cotabato
    • Amsikong Falls General Santos City revisited
    • Mangrove Tree Planting General Santos City
    • Masjid Sultan Haji Hassanal Bolkiah Cotabato City Maguindanao
    • Fort Sarangani Maasim Sarangani Province
    • Biking General Santos City to Maasim
    • Comments
    • Tags
    Adventure Race Avatar Biking Cagayan Valley. River Employment Falls Food General Santos City Golf Club Hills Itinerary Luzon Mindanao Money Recreation Review Running South Cotabato Sponsored Swimming Travel Visayas

    Latest From

    Follow Us

    Copyright 2012 General Arze. All rights reserved.

    Designed by spicytricks.